Random Thoughts

Wednesday, March 3, 2010

Monday Night Pasta

Monday Night Pasta

Recipe courtesy of The Pioneer Woman if you haven't checked her site out hop on over it is worth it!!!

Pasta with Bacon and Mushrooms

  • 2 Tablespoons Olive Oil
  • 3 slices Thin Bacon, Cut Into 1/2-inch Pieces
  • 3 cloves Garlic, Minced
  • 1 package (10 Ounce) Mushrooms, Sliced Thin
  • 1 cup Low Sodium Chicken Broth 
  • 1 cup Half-and-half
  • ¼ cups Heavy Whipping Cream
  • 3 whole Green Onions, White And Light Green Parts Sliced
  • ¼ cups Flat-leaf Parsley, Minced
  • ½ cups Freshly Grated Parmesan Cheese
  • 1 pound Thin Spaghetti Or Angel Hair Pasta

Go ahead and put the water on to boil for the pasta.
Then chop up the bacon and heat up the olive oil in a frying pan.  Fry the bacon until just brown not crispy (thats the key ~ cooked but not crispy)  I used regular bacon here but if you have pancetta I am sure it would be that much better. Remove from pan set aside.


Slice the mushrooms, now the recipe calls for white button mushrooms but you could use whatever mushrooms you like, just not canned a definite sin :) 
I found these lovely organic mushrooms mmmmm good

  • Aren't they pretty? Can mushrooms be pretty hmmm I think so...
  • Dice up some garlic and throw it all in the pan increase the heat to high and brown up those mushrooms about 4 minutes.

See again how pretty.....


Next add in the chicken broth and cook until the liquid is reduced by half about 5 or 6 minutes


Reduce the heat to medium and add in the half and half and cream ( I know it looks like alot of liquid trust me!)  Stir it around for a few minutes and the sauce will thicken.


Once it has thickened add in the bacon, green onions and the parsely.
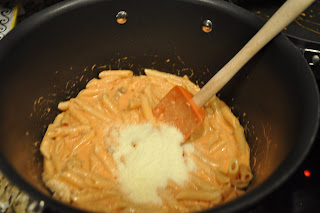
Toss in some Parmesean cheese and voila!   Toss it together with your pasta and
dinner is served!


Wednesday, February 24, 2010

Taking Stock

Taking stock, no not chicken stock more like lets true up here folks.  So I said this year my "new beginning"  hear that? it's the roar of the crowd......or not.  Anyway I said hey I can do 2 new recipes a week for an average of 104 for the year. Sure I can do it, why not, hmmm well life sometimes gets in the way, but its back in the saddle or more appropriately the kitchen again for me!  So this week I got right back at it.  I made Monday Night Pasta from that cooking queen at www.thepioneerwoman.com on appropriately enough Monday night! Let me just say this one is a keeper mmmm.  Inspired by my own culinary abilities on Tuesday I made (don't be mad Dad) Chicken and Dumplings over Mashed Potatoes, my Dad loves loves loves Chicken and Dumplings.  I promise Dad I will make it for you :)  So here I am back at it again!
Here's a peek at that pasta mmmmmm

Sunday, February 21, 2010

The Ultimate Chocolate Peanut Butter Cupcakes!!!!

Double Dark Chocolate Cupcakes with Peanut Butter Filling

Aren't they just gorgeous and my oh my are they delicious!  Perfect balance of chocolate and peanut butter!  They are so worth the effort!!!  
Gotta give credit where credit is due this recipe comes from Food and Wine magazine, by Peggy Cullen.

So lets get to it here are the players!


  • 3/4 cup plus 2 tablespoons cocoa powder (not Dutch process)
  • 1/2 cup boiling water
  • 1 cup buttermilk
  • 1 3/4 cups all-purpose flour
  • 1 1/4 teaspoons baking soda
  • 1/4 teaspoon baking powder
  • 1/4 teaspoon salt
  • 1 1/2 sticks plus 3 tablespoons unsalted butter, softened
  • 1 1/2 cups granulated sugar
  • 2 large eggs, at room temperature
  • 1 teaspoon pure vanilla extract
  • 1 cup creamy peanut butter
  • 2/3 cup confectioners' sugar
  • 1 cup heavy cream
  • 8 ounces semisweet chocolate, chopped
First pre-heat that oven to 350 degrees and line a muffin pan with cupcake liners.  

Put the cocoa in a bowl and add boiling water, whisk until it forms a smooth paste. I love chocolate!  Isn't it pretty !

Next whisk in the buttermilk (so here is a little trick if you don't have any buttermilk add a teaspoon of vinegar to the measuring cup then add whole milk and voila!) 
In another bowl sift together the flour, baking soda, baking powder and salt. Now normally I wouldn't sift, I know I know bad bad baker but in this case I think it is important!!! Sift baby Sift!
Next in a mixing bowl add 1 1/2 sticks of butter and the granulated sugar until light and fluffy and then add the eggs and vanilla,  mmmmm just beautiful, now try to resist sticking your finger in for a taste...I did.....honest!


 Next beat in the dry ingredients in 2 batches alternating with the cocoa mixture.  It smells delicious mmm sniff! Again try to resist eating it straight from the bow, I assure you I completely resisted :)


Iganache so no foul no repenting :)
FIll the cupcake liners two thirds of the way and bake for 20 to 22 minutes the cupcakes should be light and springy. 


Perfect!! 
Cool them in the pan for 5 minutes and then plop them on to the wire racks to cool.  While they are cooling in a medium size bowl beat together the peanut butter with the remaining 3 tablespoons of butter. Nice and creamy.  Next sift in the confectioners sugar and beat until light and fluffy about 2 minutes.  Next spoon the peanut butter mixture into a pastry bag with a star tip. Now if you don't have one of these, don't panic, no biggie.  You can use a ziploc bag, fill the corner tie it off with a rubber band, clip the corner on an angle, then use a sharp knife to carve a small hole in the center of the cupcake and then squeeze in the filling.   The lovey, shiny and delicious ganache will cover up the hole.

Ok so let me go ahead and apoligize for the post from this point forward.  apparently I am screaming the rest of this recipe and while I am excited by these cupcakes I can assure you screaming was not my intent:) Something occurred with the formatting and I simply cannot undo it i have even tried deleteing everything and starting over (Not my favorite thing by far!) So sorry up front!

Speaking of the ganache (and we were before all the screaming) lets get started on it.  First chop that Chocolate! 

In a small saucepan bring the heavy cream to a simmer.  Remove from heat add the chocolate to the cream and let sit for 5 minutes (seriously don't touch it resist hold back I know you can do it!) 

Waiting....waiting......waiting.......ok all this waiting a whole 5 minutes gives the chocolate a chance to melt.  Now you can whisk and whisk away until it is smooth.


Now comes waiting again, I know I know anyway let it sit for about 20 minutes as it cools it will thicken slightly. 
Now comes the fun part dip cupcakes in the icing and then back to the rack to set up.


There is that claw again hmmm I got to work on that!

See how shiny and beautiful!  So next I added a peanut butter cup and a dolop of the peanut butter filling and beautiful.
These are by far my favorite cupcakes enjoy!!


Wednesday, January 20, 2010

Hazelnut Baby Loaves


This is a recipe straight from Julia Childs "Baking with Julia" cook book. These are delicious, even the boys loved them enough to take some home, that is a sure sign off success!
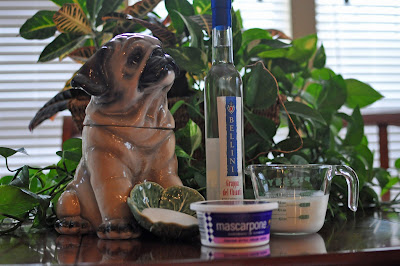
The cream topping is a Grappa-Mascarpone Cream and is simply delicious, however with these cakes good old cool whip will work too.  Grappa is an Italian grape based brandy made from the left over grape skins after wine making.  Italians typically drink grappa after a heavy meal to help with digestion and they will even add it to their espresso.  Grappa like wine is only as good as the grapes it is made from and I will say it does not smell very appetizing in the bottle.  However, in the cream it give it just the right edge it is good.  See you learn something new everyday and for those of you wondering no I didn't do shots of this straight from the bottle, I swear!).  So lets start with the Grappa Cream and again you can skip this and use your own favorite whipped cream topping.
Here are the players:


  • 3/4 cup heavy cream
  • 2 tablespoons sugar
  • 3/4 c Mascarpone 
  • 1 teaspoon grappa
This is super simple so I only really got to take one picture of the cream in progress.
First whip that cream with the sugar until it forms soft peaks.  Next in another bowl gently
with a rubber spatula mix the mascarpone just to loosen it up and be gentle this stuff is rich and mixes very easily. Add in the grappa to the mascarpone and then fold in the whipped cream and sugar mixture.  Mmmm doesn't it look delicious!


Thats it ! Your done.  Try to keep your fingers out of it and put it in a covered container to chill until you are ready to serve. I like easy:)

So now onto the star of the show the Hazelnut Baby Loaves
Here are the players


Now I must say  here in this picture you see the "de-skinned hazelnuts" If you can find hazelnuts already de-skinned, buy umm.  I unfortunately could only find the ones with the skin on, but fortunately Julia tells us just how to remedy that.  If you are lucky enough to have de-skinned hazelnuts then skip this next step.

  • 1/3 cup hazelnuts peeled
  • 1 cup sugar
  • 1 2/3 cup flour
  • 2 teaspoon baking powder
  • 1 teaspoon salt
  • 1/2 teaspoon pure almond extract
  • 1 cup creme fraiche (you can substitute heavy cream here)
  • 1 stick butter (no substitute use the real thing, this is the good fat in your diet my friends) make sure it is at room temp
  • 2 large eggs also at room temp
  • A smal amount of melted butter for greasing the pans and you will need 8 mini loaf pans which you can get the foil ones right at the grocery store at 5 to a pack.
Heat the oven to 350.
So lets get to skinning those nuts!  That didn't come out right but you know what I mean.
Bring about 2 cups of water to boil on the stove.  Once boiling add 3 tablespoons baking soda (not powder) and this is an interesting effect if fizzes all over the place including my clean stovetop:(
Throw in the nuts and boil for about 3 to 5 minutes until you see the water turn blackish


See that spatter on the side of the pan, I probably should have used a bigger pan because that stuff was all over my cooktop too:(


So do a little test when you think they are ready, take one out and plop (don't you love that official culinary term) it in a bowl of cold water, like so.


Rub gently and that skin should just slide right off. It is the baking soda bath that makes them ready to jump right out of their skin!


See how pretty they are bare naked;)


So next go ahead and melt about 2 tablespoons of butter and take a pastry brush and brush it all over the mini loaf pans.  Then dust each pan with a little flour, just tap out the excess, they are ready to be filled.


Look at umm all lined up so pretty:)
So next grab them naked hazelnuts and put them in a food processor (I have a very little one) with 1 tablespoon of sugar.  Now if you do not have a food processor you can use a chopper (like my  handy dandy pampered chef chopper) of any kind. You need them finely ground but you need to be careful not to overdo it or you will have hazelnut butter.


See finely ground in my little Cuisinart Mini Prep (now that don't make this little guy anymore but they have similar ones)
So take your finely ground naked hazelnuts (I just like saying naked hazelnuts I'll try to resist I promise)
mix them in a bowl with the flour, baking powder, and salt and set aside.
In another bowl mix together the creme fraiche (or heavy cream) and the almond extract together until blended.  Now in yet another bowl (ok I never said you wouldn't have dishes to do right) with your mixer beat on medium high the butter and the remaining sugar until light fluffy and pale about 3-5 minutes with a standing mixer or 6-8 with a handheld mixer.

See creamy, pale and ready!
Next fold in the dry ingredients alternating with the cream (split it into 3 dry additions and two cream additions) The batter will be thick!


Now hold yourself back try not to eat it straight out of the bowl cause trust me you will want to:)
Divide the wonderful smelling and tasting batter among the prepared pans filling them about half way to two thirds of the way full.  Tap the pans against the counter to settle the batter.  Place the pans on a cookie sheet and back for about 30 minutes. Insert toothpick in center of cake to test for doneness..
As soon as they are done baking turn them immediately out onto a rack flip them right side up and let them cool.


Aren't they beautiful!

Serve these babies sliced and plop some of that awesome cream on top it is wonderful.  Enjoy!


Sunday, January 17, 2010

Lemon Squares Part 1 - the good the bad and the just plain yuck!


Ok so I made Lemon Squares last week and just the word Lemon Squares sends my taste buds tingling for that creamy lemon filling over a shortbread crust.  I mean seriously hmmmm if you like lemons it doesn't get much better.  So I had such high hopes when I found a recipe (that shall remain nameless) that used honey instead of sugar.  I thought what a great combination.  As you can see from the picture above it is a beautiful square just perfect.  So at first bite I thought hmmm the texture is a little off, then as I chewed (and yes chew is the operative word here folks) I thought hmmm the taste is a little well, hmm different.  So the crust was fantastic but the lemon filling, well it was like a chunk of lemon honey tea is all I can think of to describe it.  So for those coworkers looking forward to Lemon Squares please don't be frightened off by my first try (I spared you the taste test didn't I?).  But alas not all were spared...
So just to make sure my tastes were on the money.  Lets face it we have all done it smelled something or tasted something and then asked some unsuspecting friend or loved one "oh here taste this does this taste bad"?  Most of the time like sheep being herded they dutifully do as they are asked before they even think to say "uh nope not gonna do it".  My kids however were on to this trick years ago and just look at me with that "oh Mom please don't make me look" that I can't resist so they are usually spared.  So the first was of course LML (love of my life) having just arrived fresh off a plane presumably missing me full of hope and willing to please I took advantage of the situation.  In my most cheerful and loving voice I said "Here Honey look what I made, try one".  He eyed it at first a little wary and I knew he was thinking "are lemon squares supposed to look like that" but he took a bite anyway.  Then he really inspected the square poking at it with his finger right before he ejected the not fit for consumption object out of his mouth.  Then he turned and looked at me like why why would you do that to me?  I, in the mean time, was doubled over laughing which needless to say didn't make matters any better.  So after much reassurance that what he had in his mouth for a few short moments wouldn't harm him or totally ruin his taste buds for life he forgave me.  Next I told my best friend "oh come try my lemon squares I think they may be missing something",  I neglected to inform her that it was good taste that was missing but oh well.  Now this was an interesting reaction she ate the whole square, hmm ok and promptly said that she was starving and that is why she consumed the whole thing but no it is not good.  Interesting huh?  I think she must has yet to build up an immunity to the "oh here try this" syndrome.  Not to worry with two recipes a week I will have here running for cover in no time.  Now to be fair she also said it was not bad just not a lemon square more like a honey lemon tea square with a very unique texture like something that had congealed.  Nice huh.
So needless to say the Lemon Squares Part One was one for the disposal and in they went. Stayed tuned because the glutton for punishment that I am I am trying them again today.  Be warned I need a fresh set of taste testers for these babies.

Sunday, January 10, 2010

Penne Pasta with Vodka Sauce

So last week the LML was home for the entire week, sheesh, just kidding it was nice having him home all week.  So every night he looks at me and says "Whatcha making me tonight?"  So the other night I thought hmm what can I make him and satisfy my resolution at the same time?  I thought hmmm vodka sauce yezz I will make zee vodka sauce and you will love zee vodka sauce (that was me doing my Russian accent:) So I said a quick prayer to the pantry god (betcha didn't even know there was such a thing) please let me find all the right stuff!  And voila I did (ok I made a couple substitutes but no biggie).  And get this, this recipe only took me about 20 minutes pictures and all!!
Here are the players


  • 1 pound Penne Pasta
  • 2 Tablespoons Olive Oil
  • 2 Tablespoons Butter
  • 1/2 medium size Onion, chopped fine
  • 2 cloves Garlic, chopped
  • ¾ cups Vodka
  • 1 can Tomato Sauce (recipe called for Puree)
  • 1 cup Heavy Cream
  • 1 small pinch Red Pepper Flakes (more if you like a little kick)
  • ¼ teaspoons Salt
  • Pepper, To Taste
  • 1 cup Grated Parmesan Cheese
  • I also added a few chopped mushrooms as well


Cook the Penne Pasta according to the package be careful not to over cook.


Chop up the onion and garlic.  Small tip take the can of sauce and smash (not too hard) the garlic and the skin will slip right off.  So you know I hate chopping onion, cause I hate to cry, but I actually did chop the onion rather than using my Pampered Chef chopper which I love.


this is me chopping:( and crying but just a little

Next In a large skillet over medium heat, warm up the olive oil and butter. 


When the butter is melted, add in the chopped onion and garlic. Stir and cook for roughly two minutes. 


Look how pretty (I used a red onion cause it was so pretty..naw it was what I had:)


Pour in zee vodka. Stir and cook for three minutes.  Don't worry when you first add the vodka it will be a little watery looking but the vodka cooks off pretty quickly.


Add in the tomato sauce and stir until completely mixed, isn't so beautiful and it smells delicious. Reduce heat to LOW.  


Now it is time to add the cream and it is important to use heavy cream, no half and half here.


mmmmmmm so good.
Stir gently to mix and add the red pepper flakes (if you like a little kick otherwise skip it) and salt and pepper


See now get real close to the screen and inhale deeply, you can almost smell it!
So while we were making the sauce our pasta was cooking and has been drained right?? 


Now add the sauce to the penne and mix in cheese and stir, remove from heat.


It is fantastic.  Now don't eat it right out of the pan mind your manners and get a bowl :)


Enjoy!!!


Saturday, January 9, 2010

Chicken Saltimbocca

Ok I know I know you were wondering hey did she forget about us we are here waiting for that Chicken Saltimbocca recipe, ok maybe not so much.  Anyway here it is and just let me say it was delicious! So lets hit it! Here are the players.


1 10 ounce box frozen chopped spinach thawed
3 tablespoons olive oil
1 1/4 teaspoons salt
1 teaspoon black pepper
6 Chicken cutlets (you can use boneless breast and flatten them yourselves if you can't find cutlets
6 paper thin (and I mean paper thin here folks) slices of prosciutto
1/4 cup parmesan cheese
1 14 ounce can chicken broth
3 tablespoons fresh lemon juice (about 1 lemon)

Ok lets get to it folks, let me say that this recipe only takes about 25 minutes total prep and cook time, so it is a quick meal.  So first take the spinach and squeeze out all of the excess water (and yes I used my hands and squeezed like playdough) Next season the spinach with 1 tablespoon to of the olive oil and a little salt and pepper (1/4 teaspoon each).
Next place the cutlet on a flat surface, sprinkle a little salt and pepper then lay a piece of the prosciutto on the chicken.  Now let me stop here for a brief commentary.  I know you might be tempted to substitute regular ham for the Prosciutto, aka italian ham,  but don't the prosciutto is just the right balance of salt to taste, so go for it splurge a little.
Next layer in a little parmesan cheese.


There isn't that pretty.
Next beginning at the small end roll up each cutlet and secure with the toothpick like sooooo


Look at em all lined up like little soldiers ready to hop in the pan.....ok maybe not so much but in the pan they will go!


Next in a large skillet heat up the remaining 2 tablespoons of olive oil over high heat, when the oil is hot add the chicken rolls and cook just until golden brown, roughly two minutes per side.


The look so cute in the pan!
Once they are lightly browned add the chicken broth and lemon juice and bring to a boil.  Reduce the heat to medium, cover, and simmer until the chicken is cooked about 4 minutes.

 Remove the chicken from the pan and plate it, then increase the heat to high and cook the sauce until it reduces to about 2/3 of a cup (about 5 to 7 minutes) Then drizzle the sauce over the chicken and voila!


Until next time folks.  My goal for tomorrow is to make the Hazelnut Baby Loaves (this is a double whammy a bread recipe and a Julia recipe be afraid be very afraid!)